Create a team
For team leads · 4 min
Start a team, invite your teammates, and set who can do what. Each person keeps their own account, contacts and deals.
Watch
Or read it step by step
-
Team setup
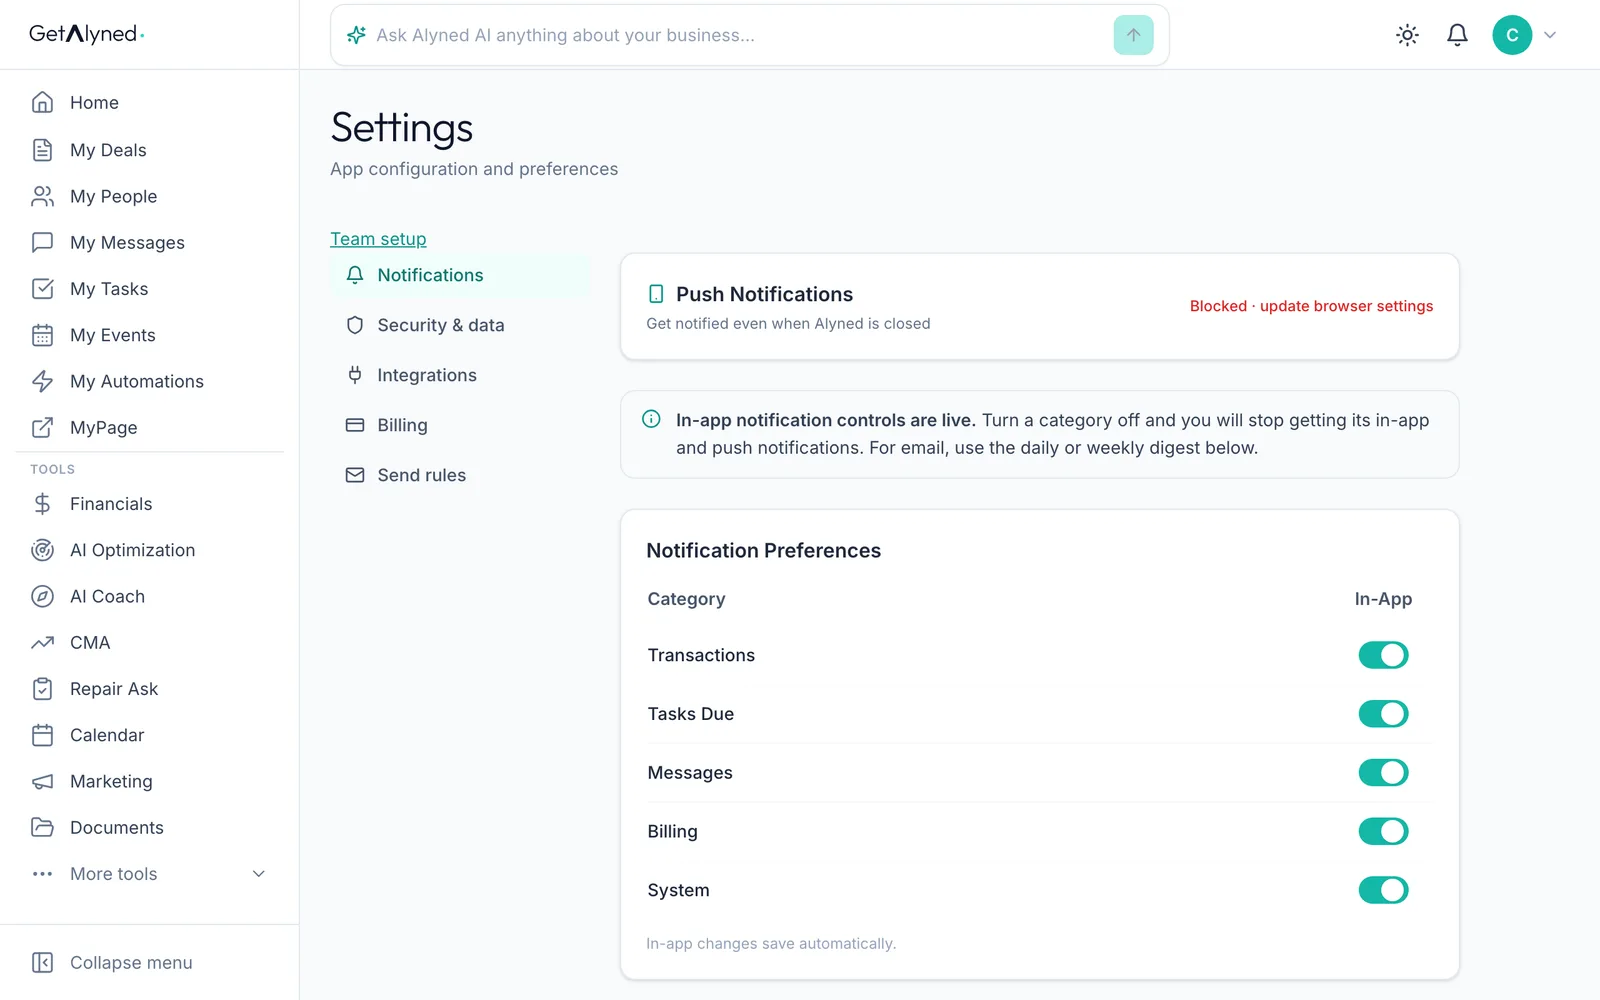
Teams start in Settings. Team setup is the link at the top.
-
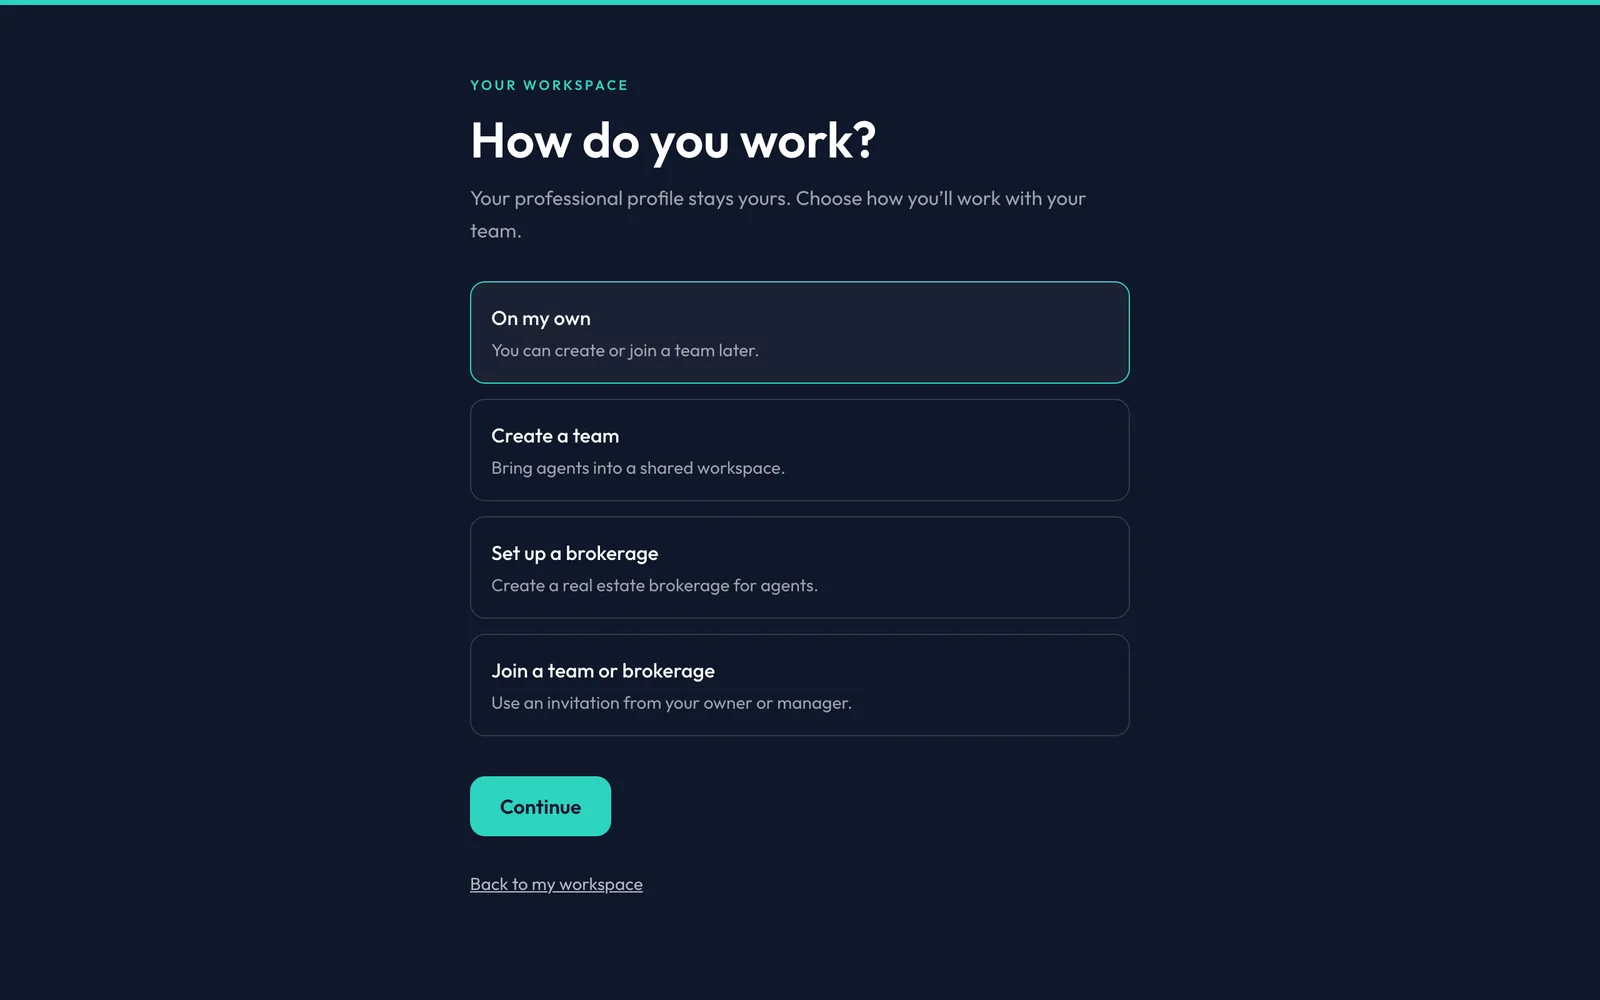
Create a team
Create a team brings agents into a shared workspace. Your own profile stays yours, and you can come back to this later.
-
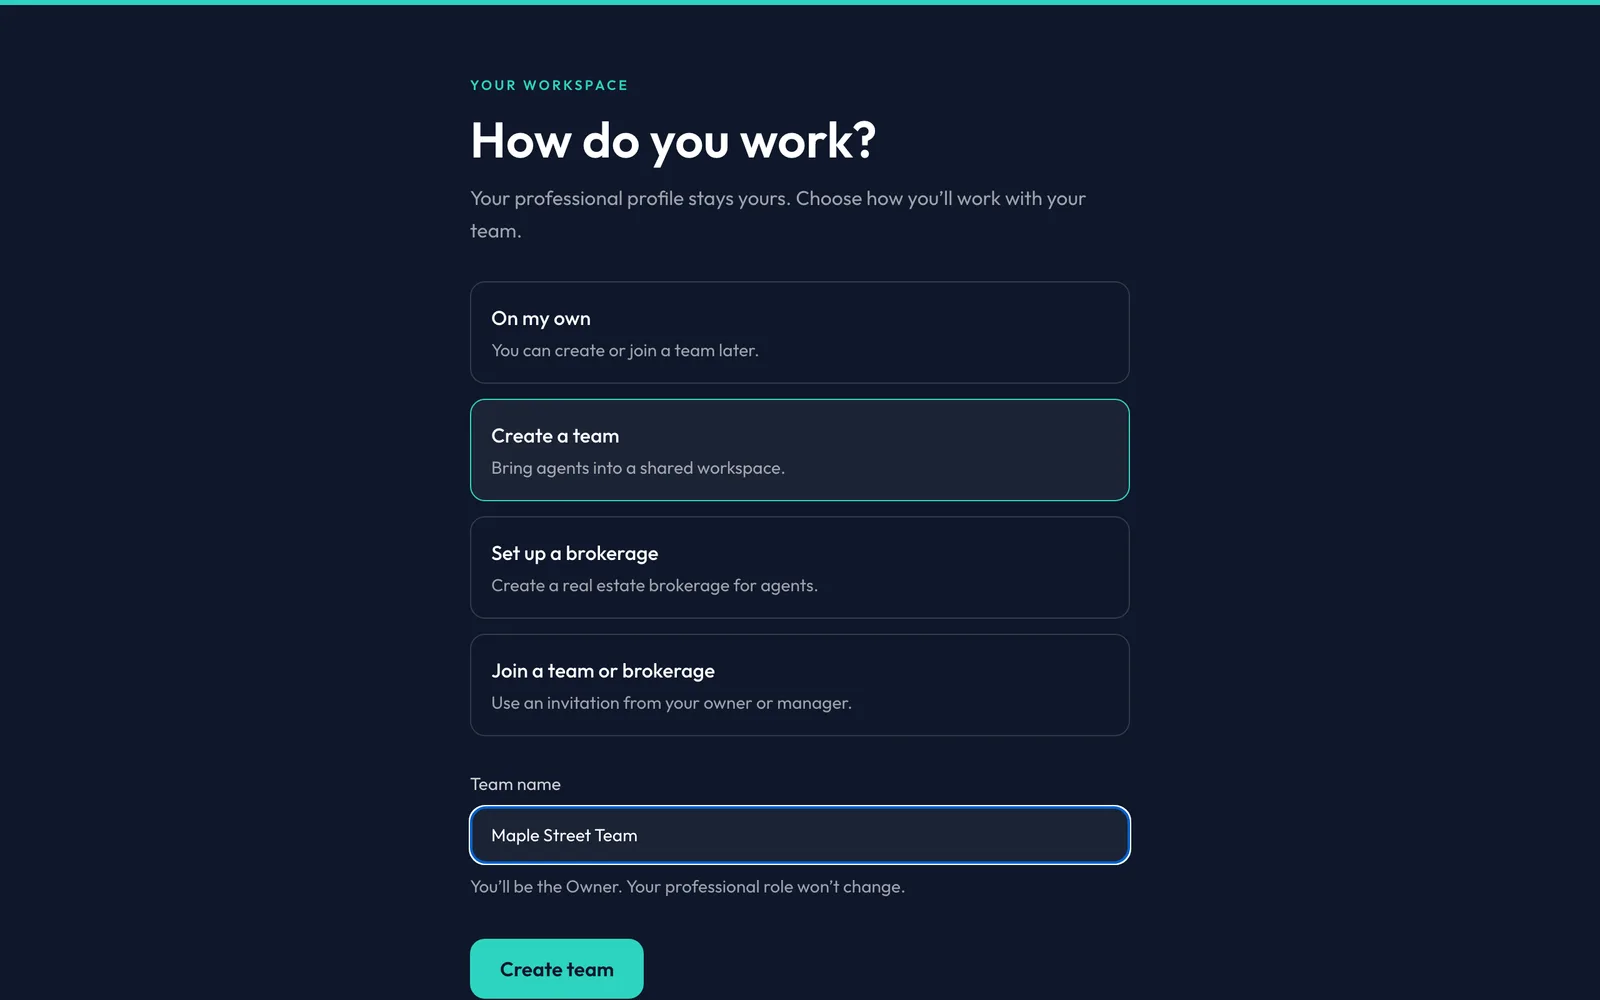
Name it
Give the team a name. You become its Owner, and your own role and account don't change.
-
Create team
Click Create team. A team starts right away, with no review. Only a brokerage is reviewed first.
-
Invite teammates
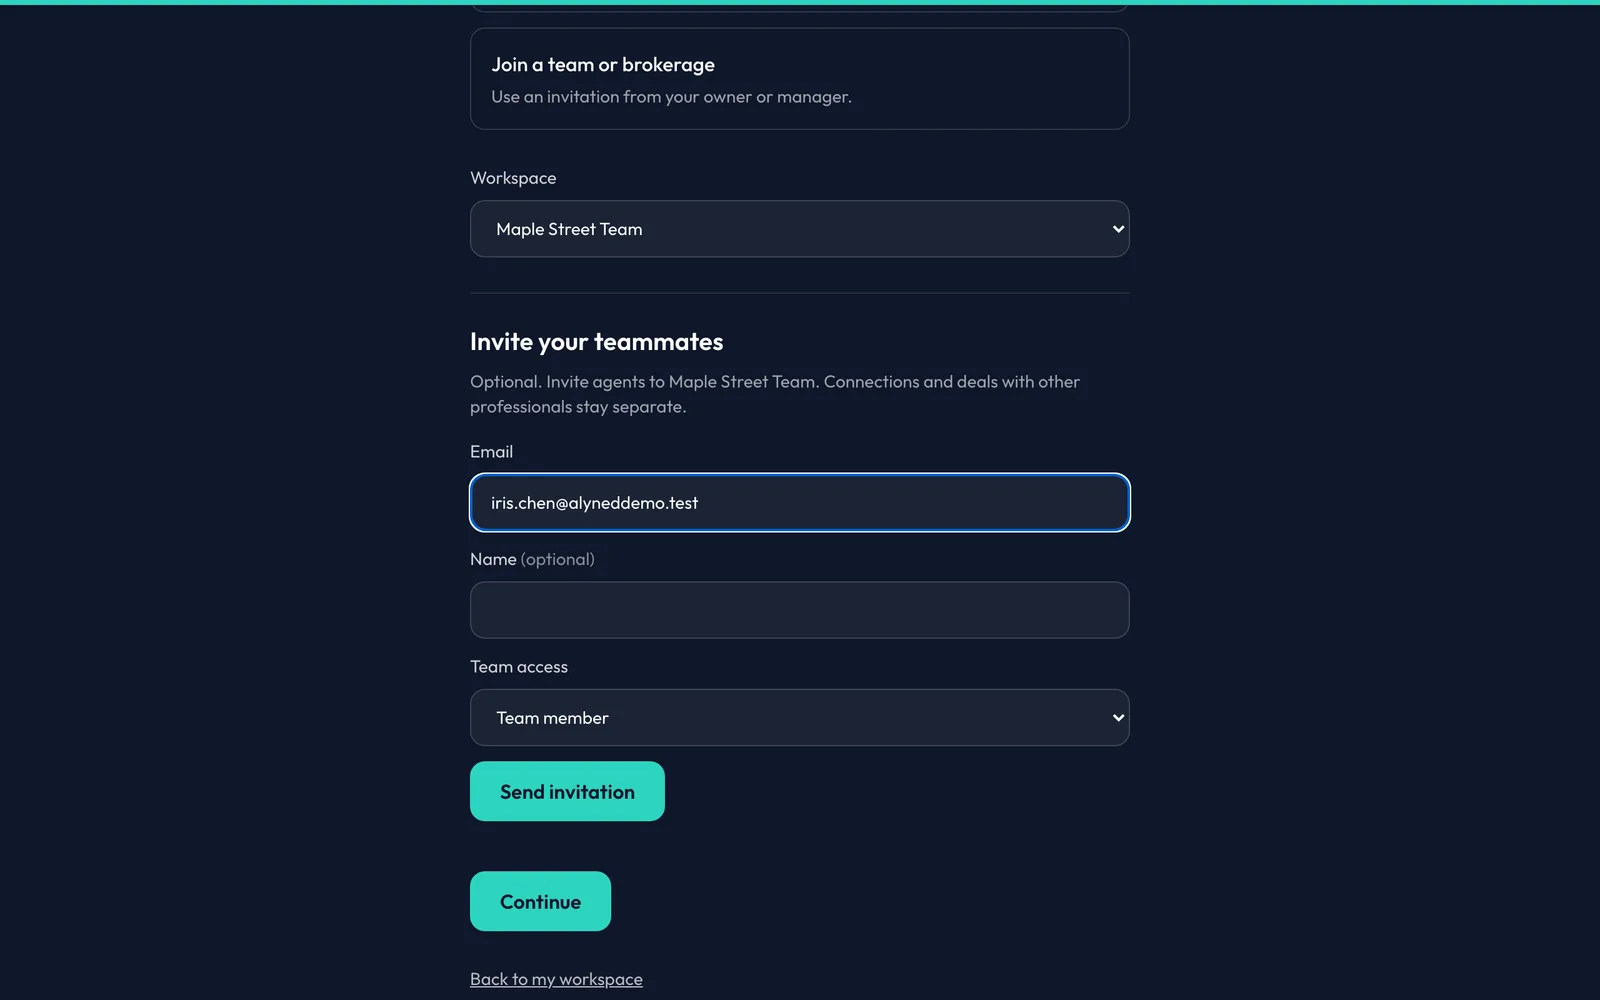
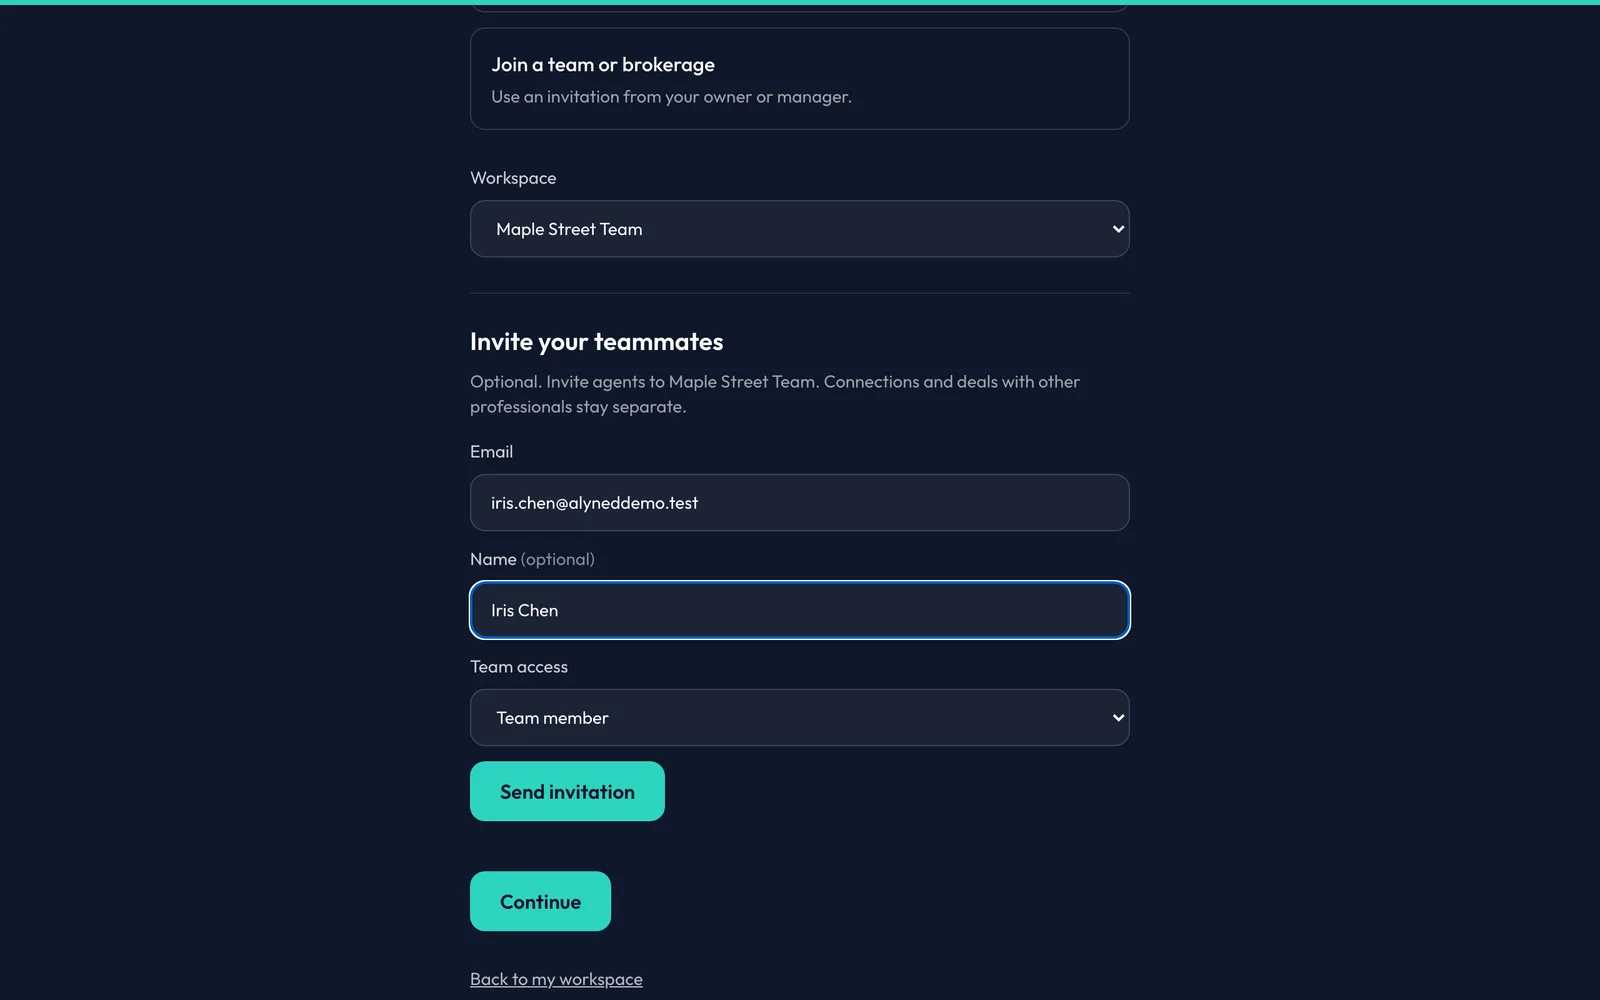
Invite teammates here or later. Pick their access: Team member, Manager or Admin. Only managers and up see what teammates share.
-
Send it
Click Send invitation. It lasts 7 days.
-
Continue
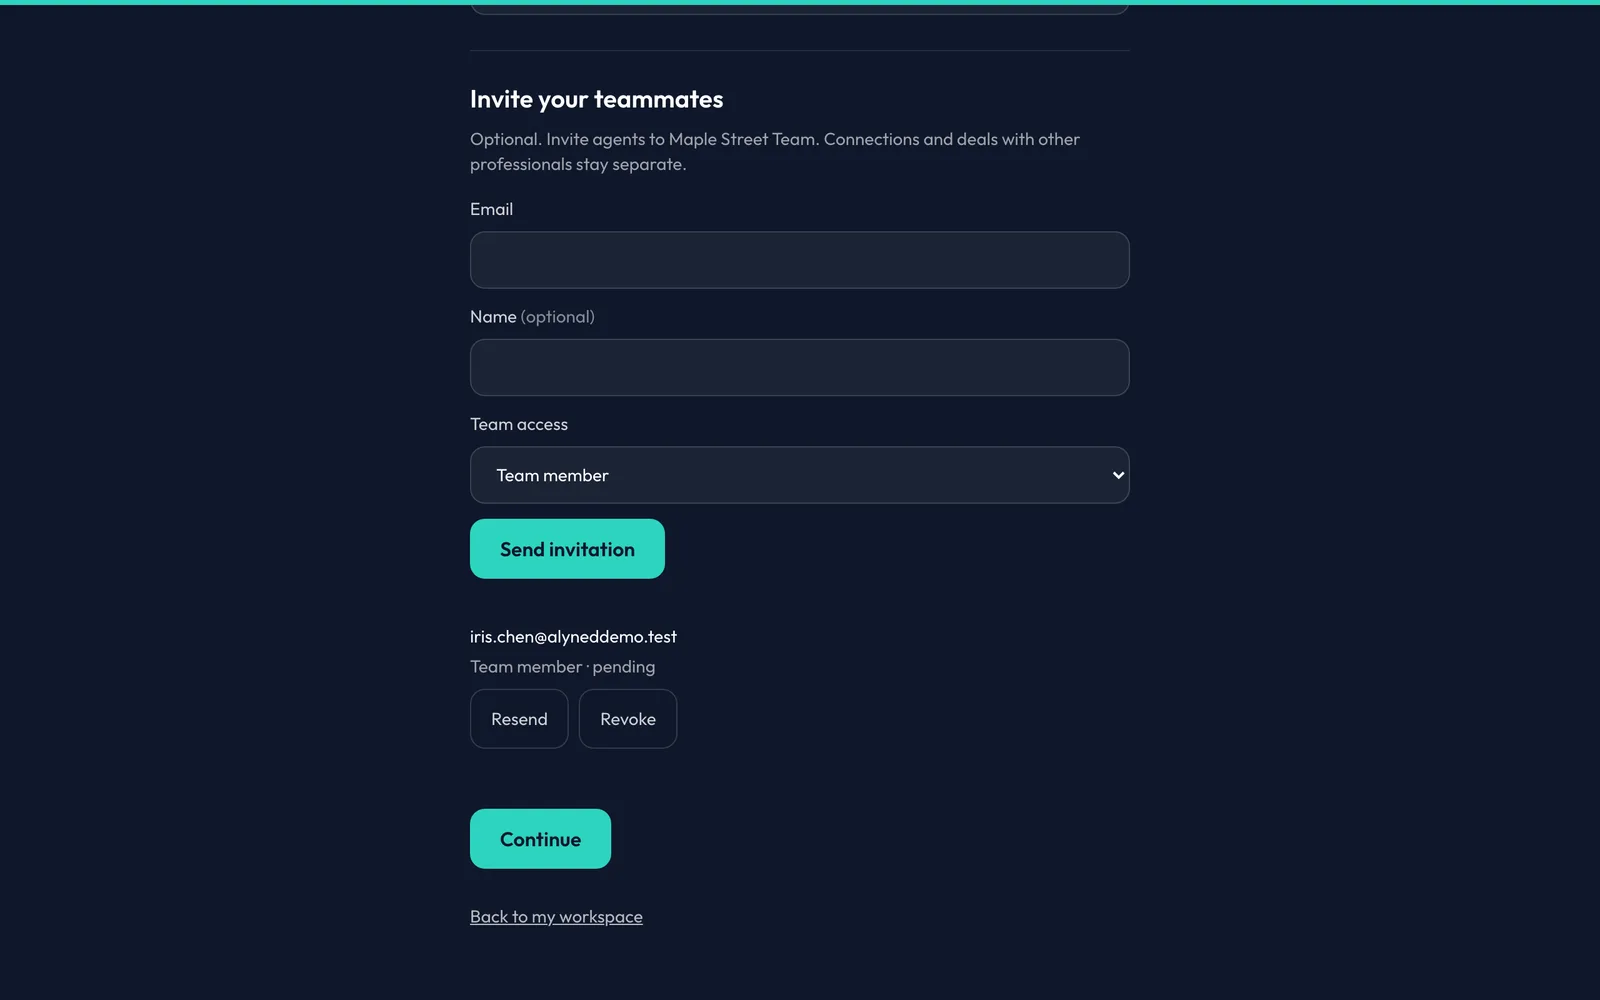
The invite waits under your team. Continue takes you to your dashboard.
-
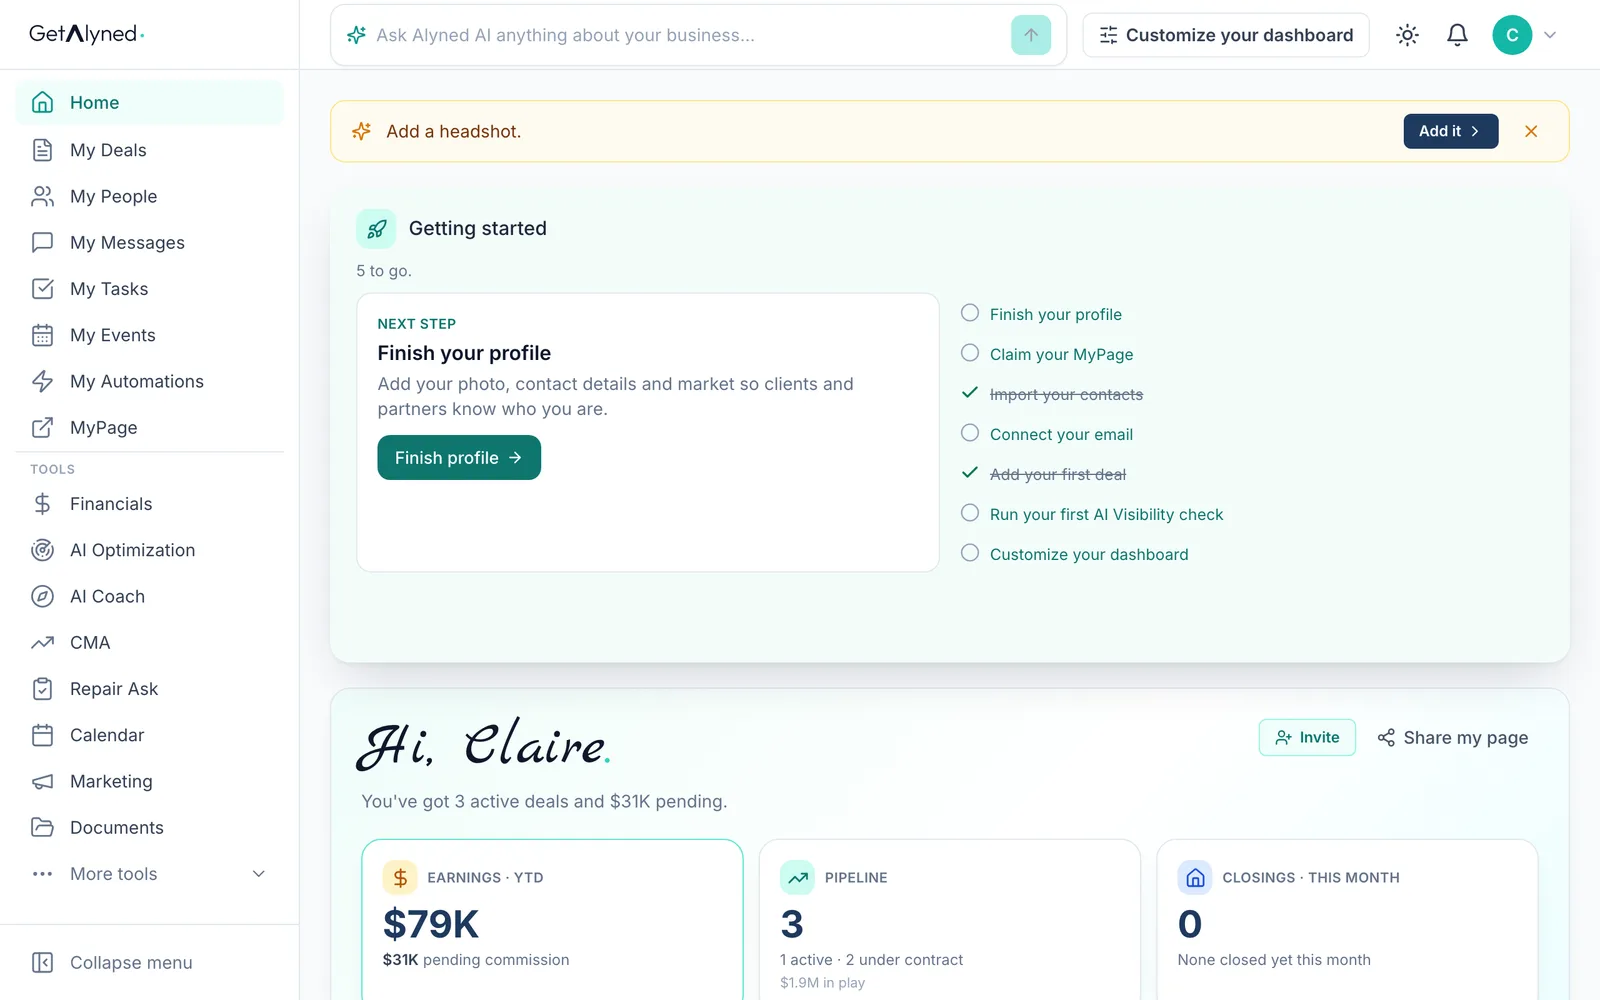
More tools
Your team lives under More tools.
-
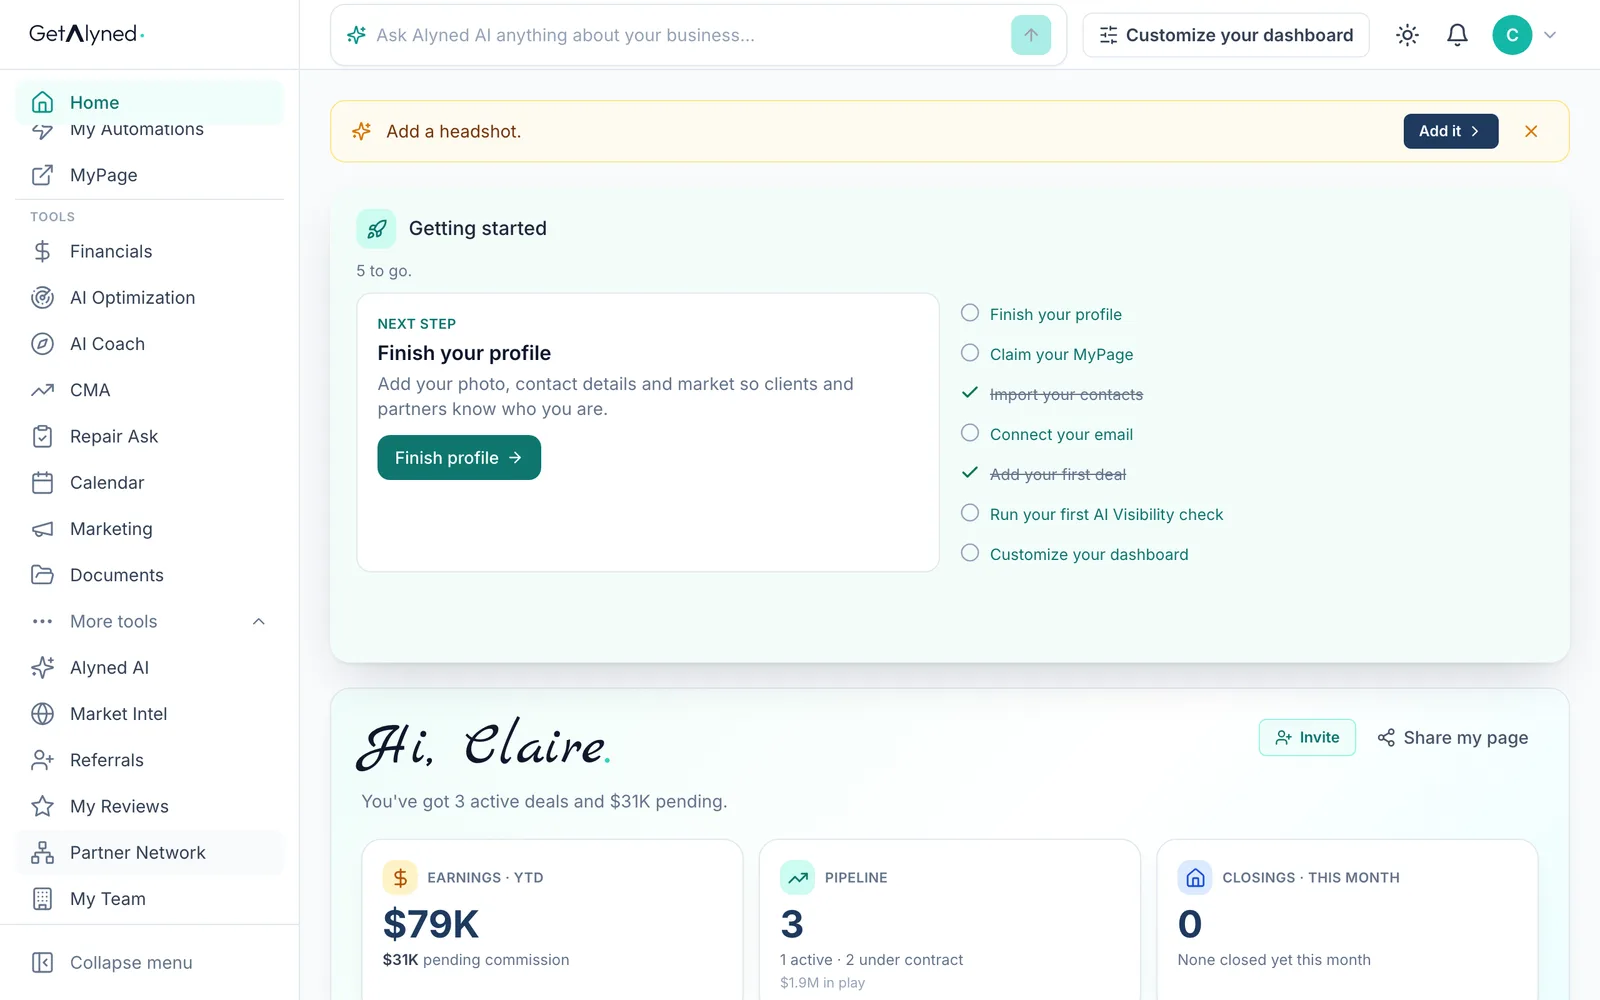
My Team
My Team shows up once you belong to a team. Only people on a team see it.
-
People
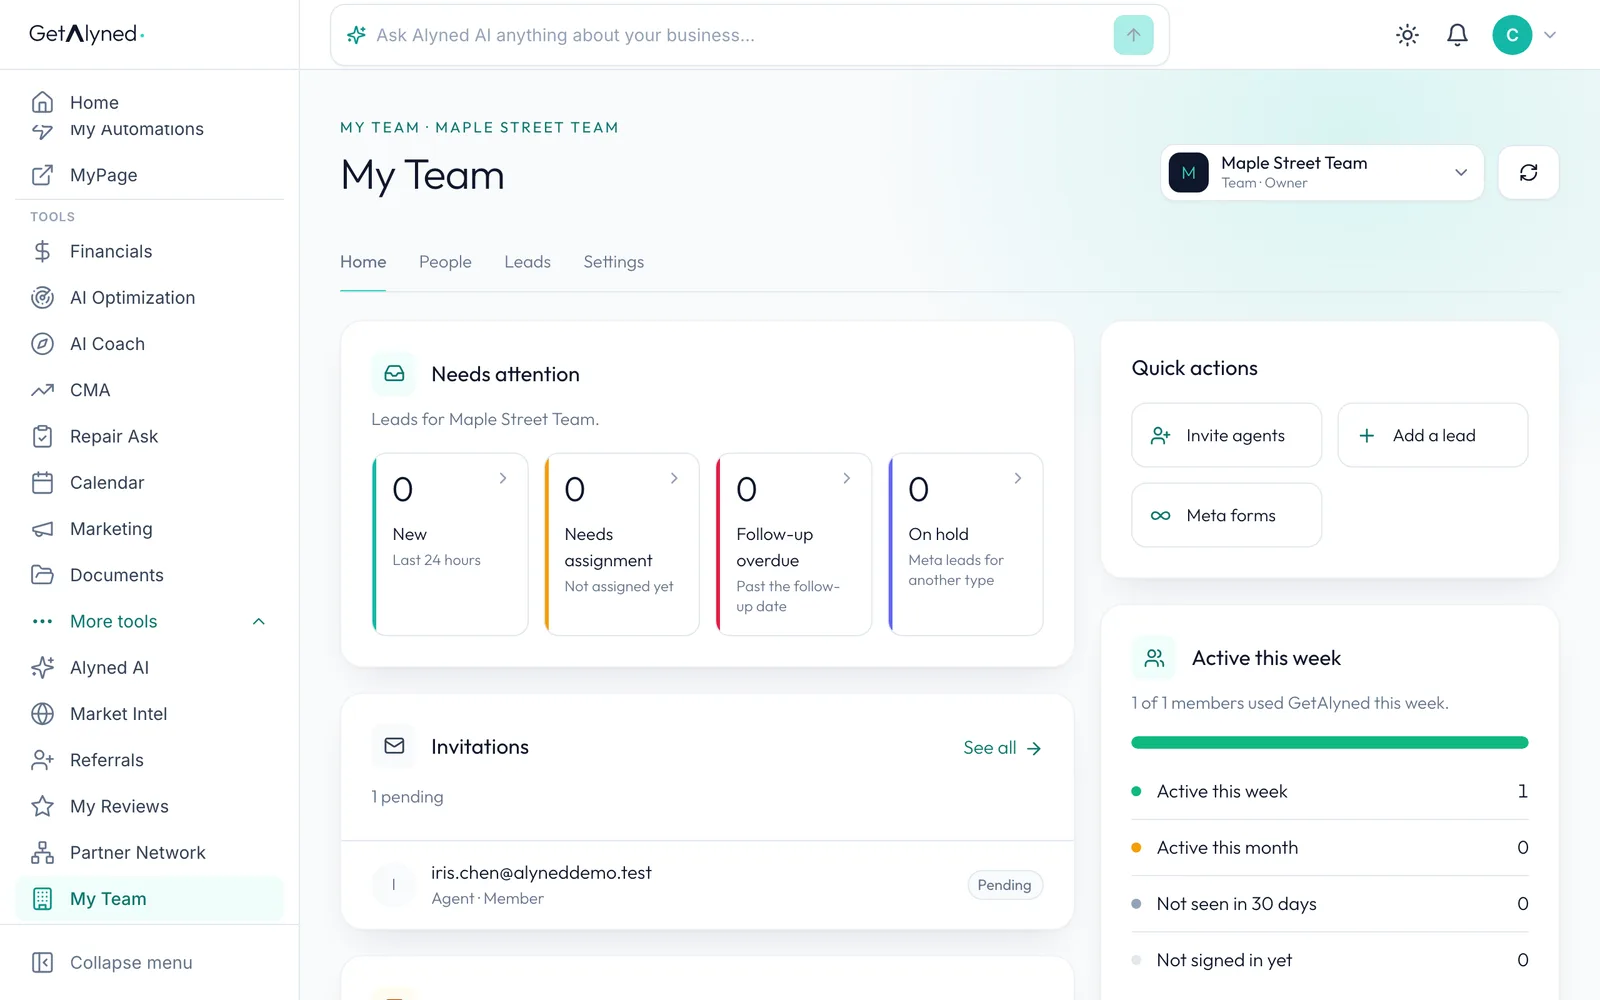
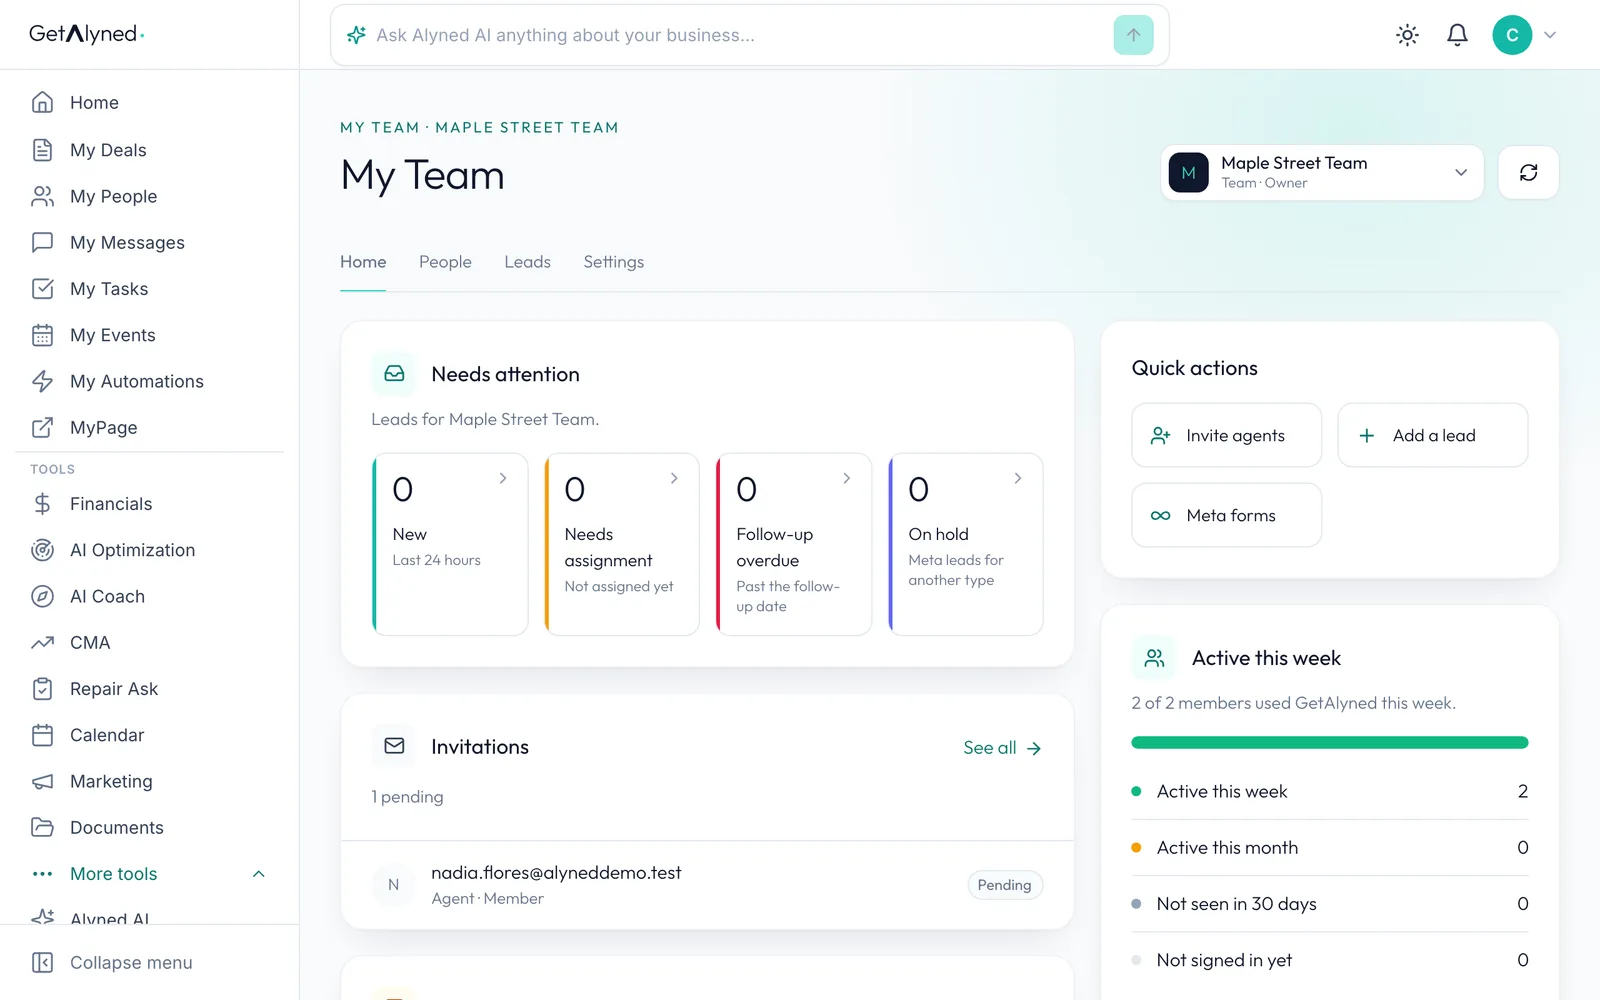
Home is your overview. People holds your members, invitations and what the team shares.
-
Invites
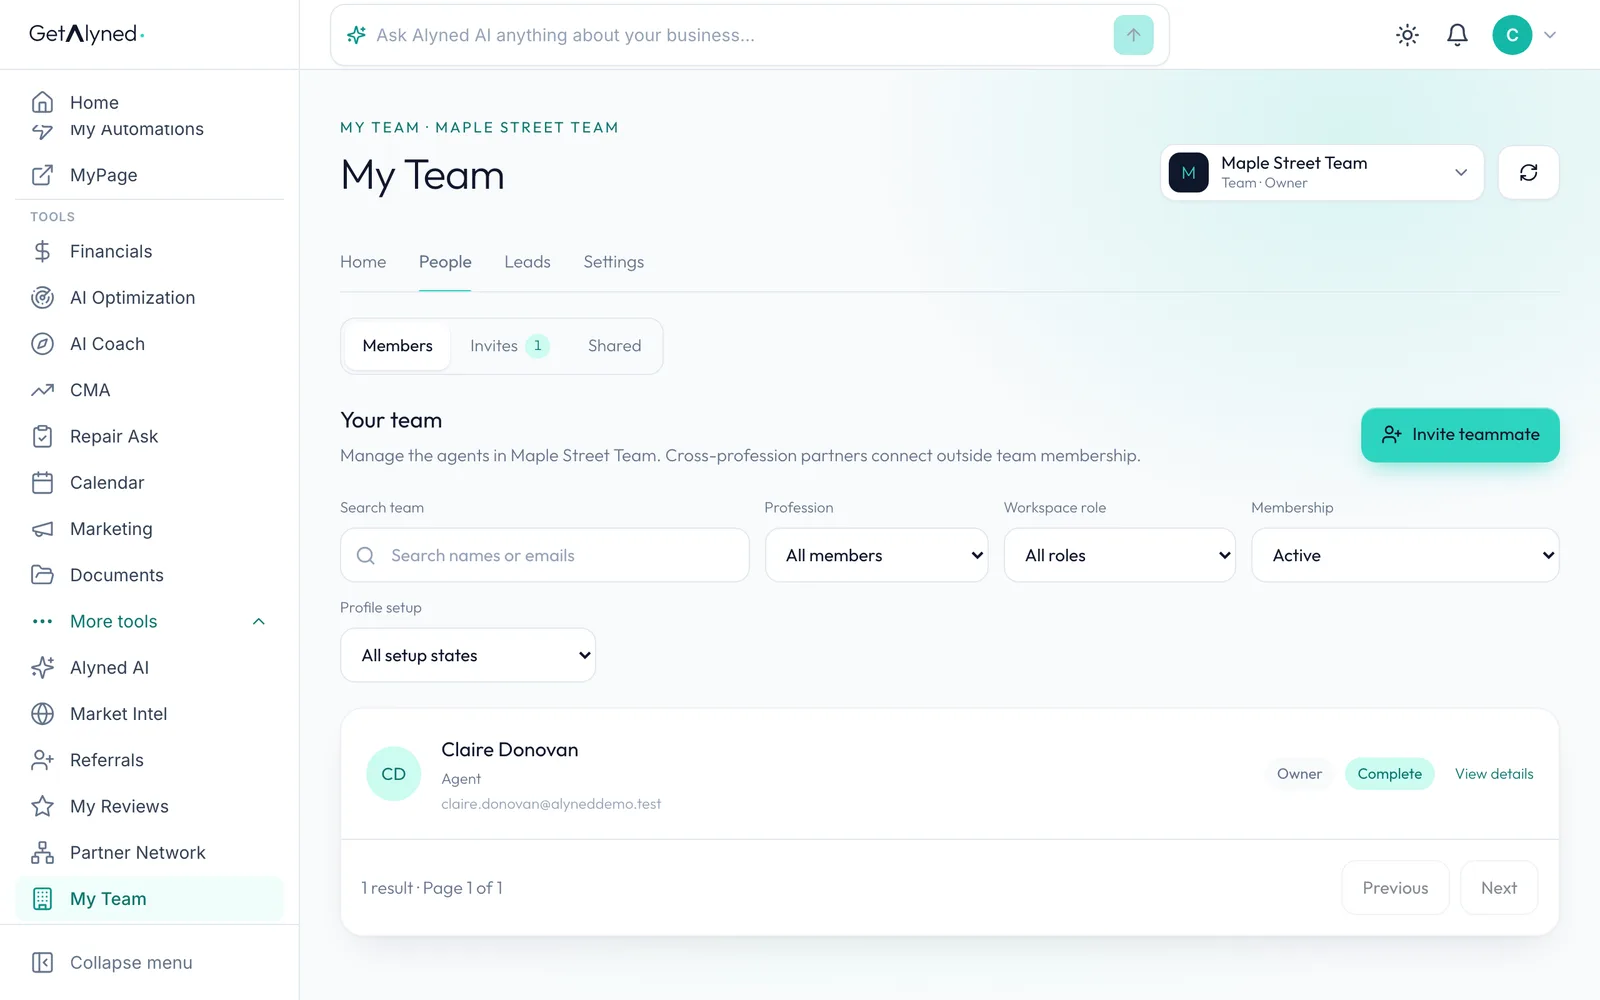
Invites lists every invitation.
-
Invite people
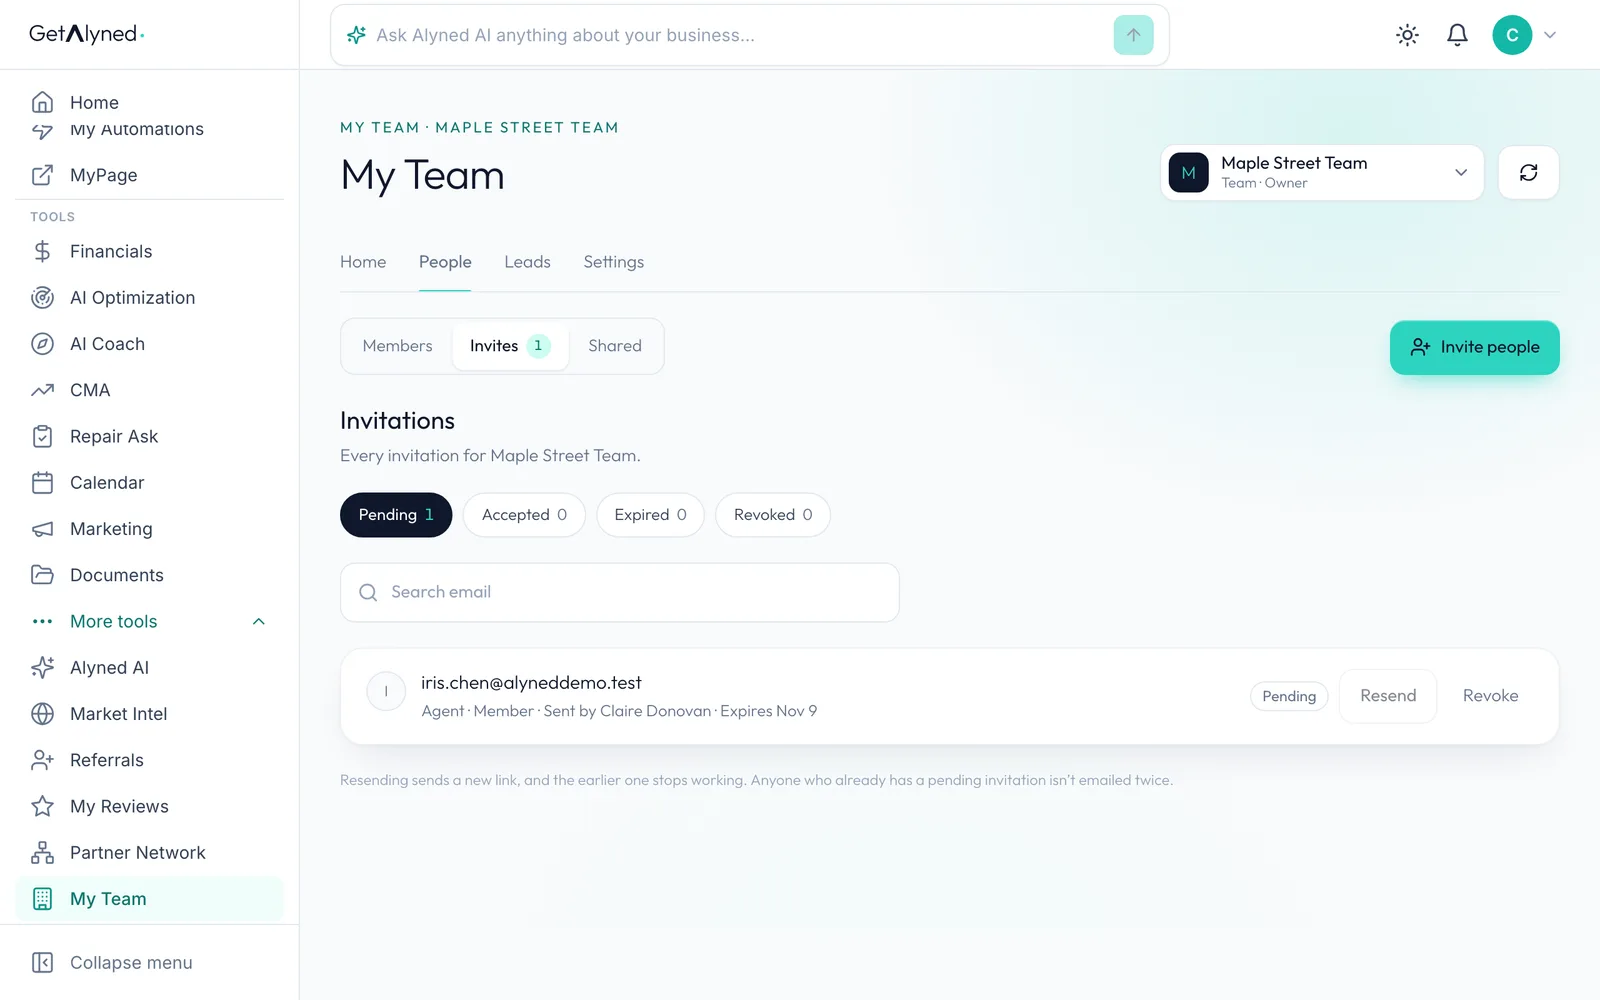
Invite people takes a whole list at once.
-
Paste addresses
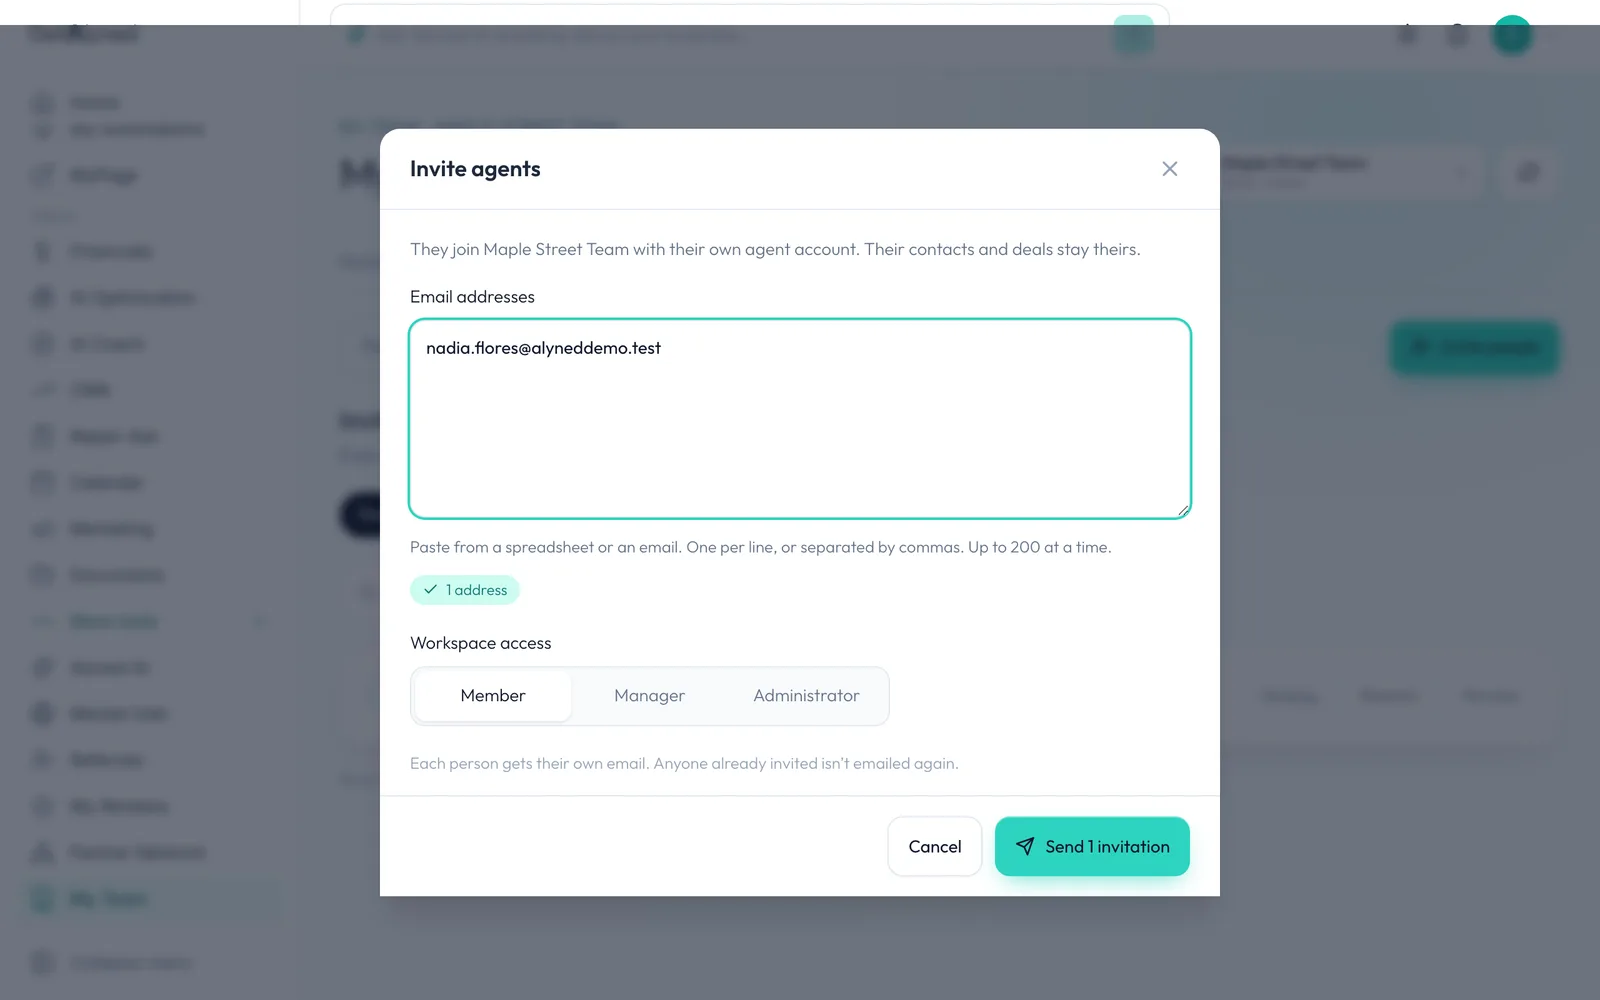
Paste one address or up to 200, from a spreadsheet or an email, and choose their access. They join with their own account, and their contacts and deals stay theirs.
-
Send
Each person gets their own email. Anyone already invited isn't emailed twice.
-
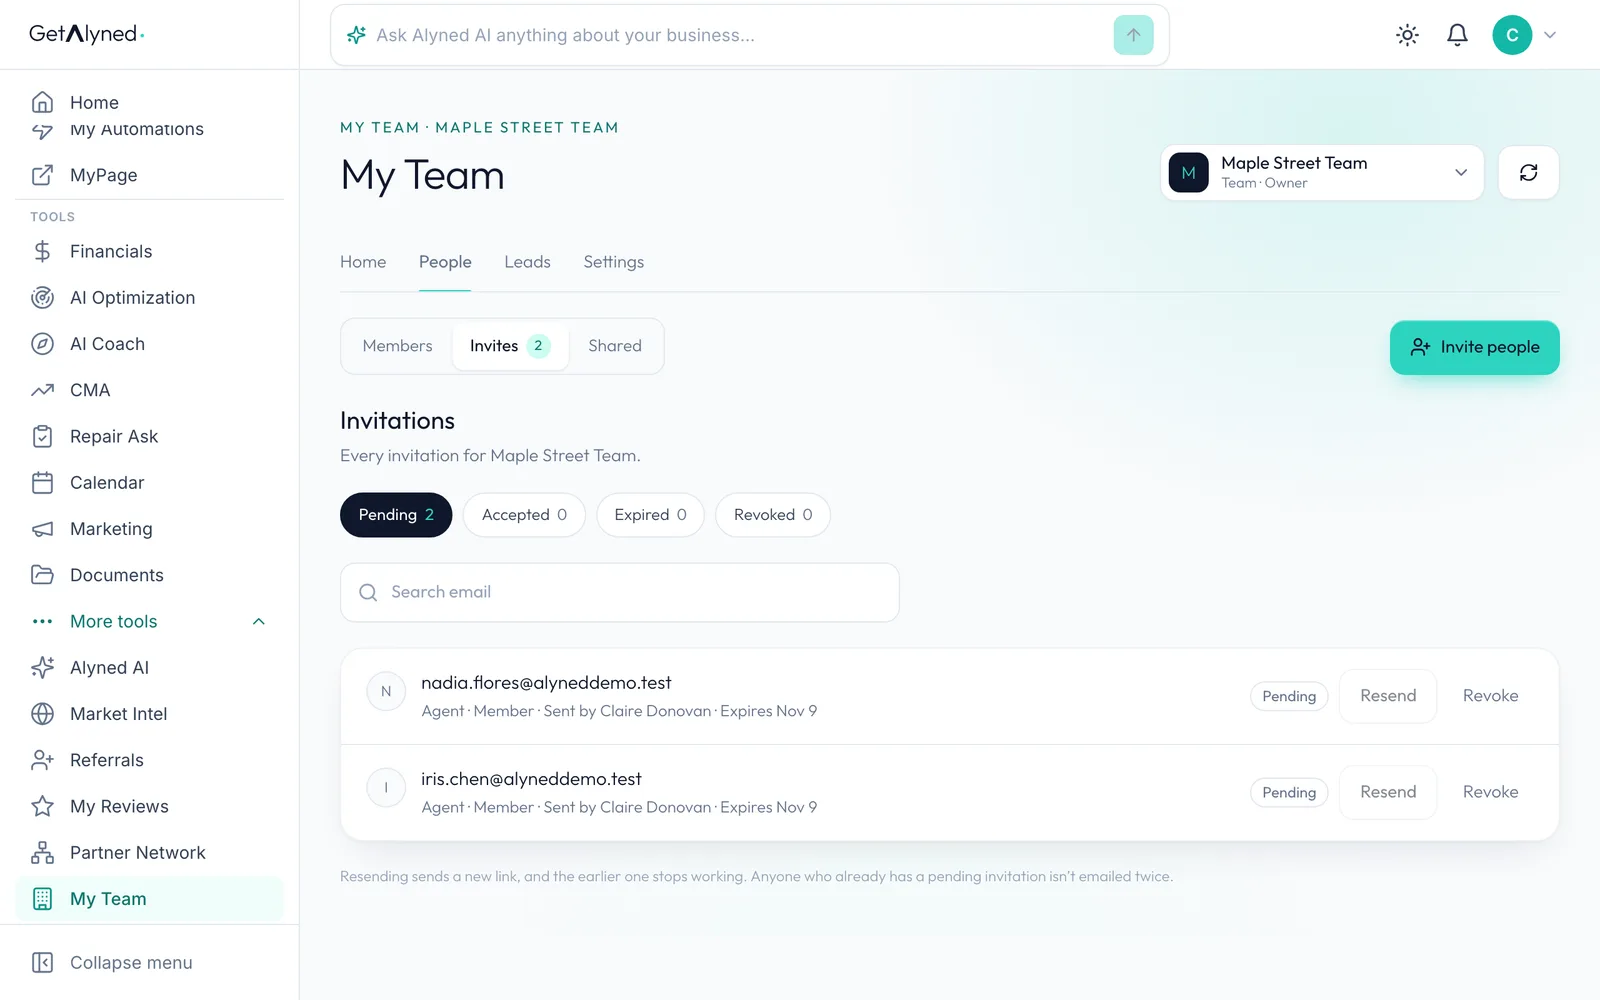
Pending invites
Pending invitations show here with Resend and Revoke. Resending sends a new link, and the earlier one stops working.
-
What they get
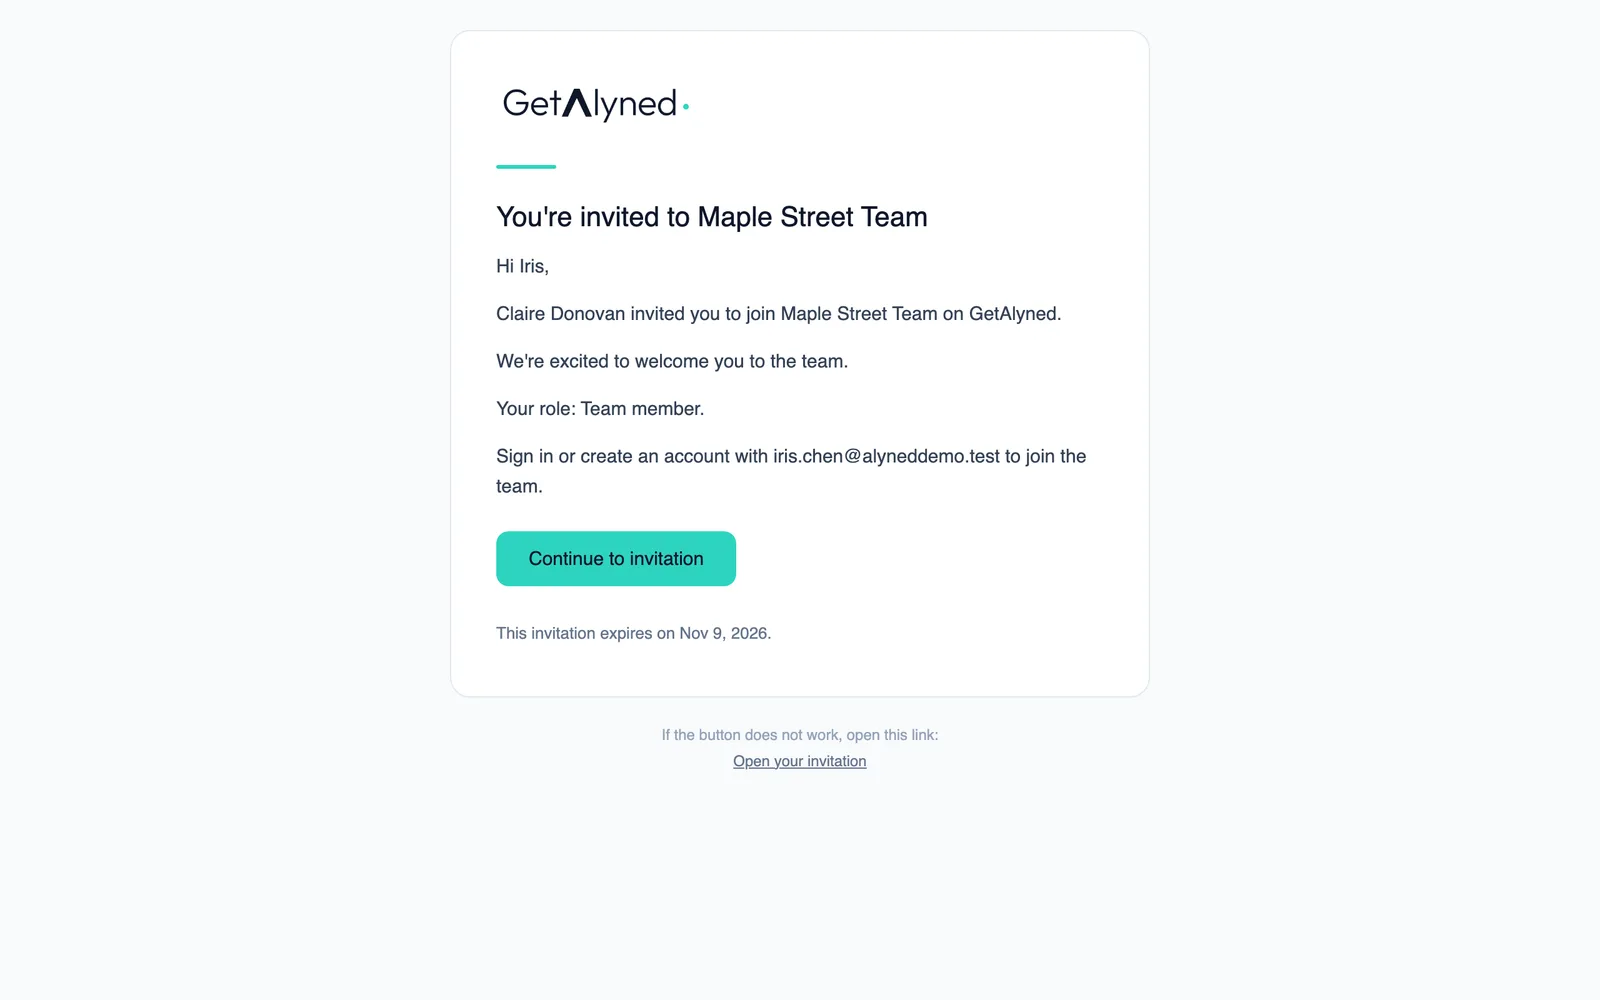
Here's the email your teammate gets. Someone with no account can create one from the invitation.
-
Accept and join
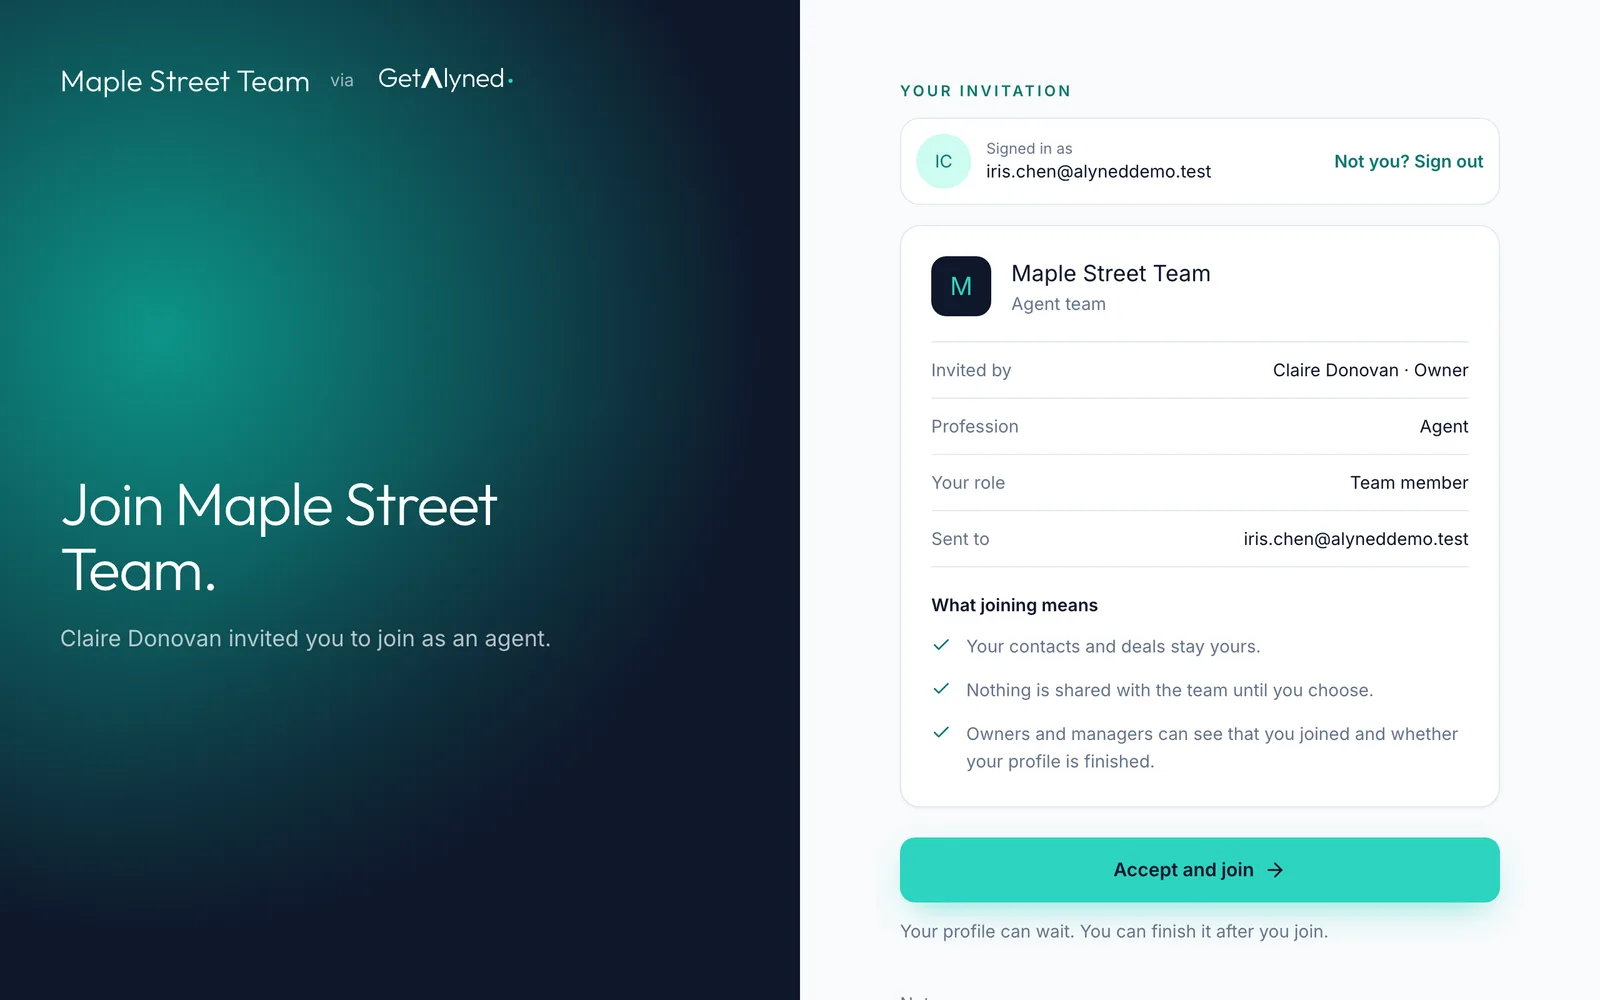
The invitation shows who invited them and their place on the team. Accept and join is one click.
-
They're in
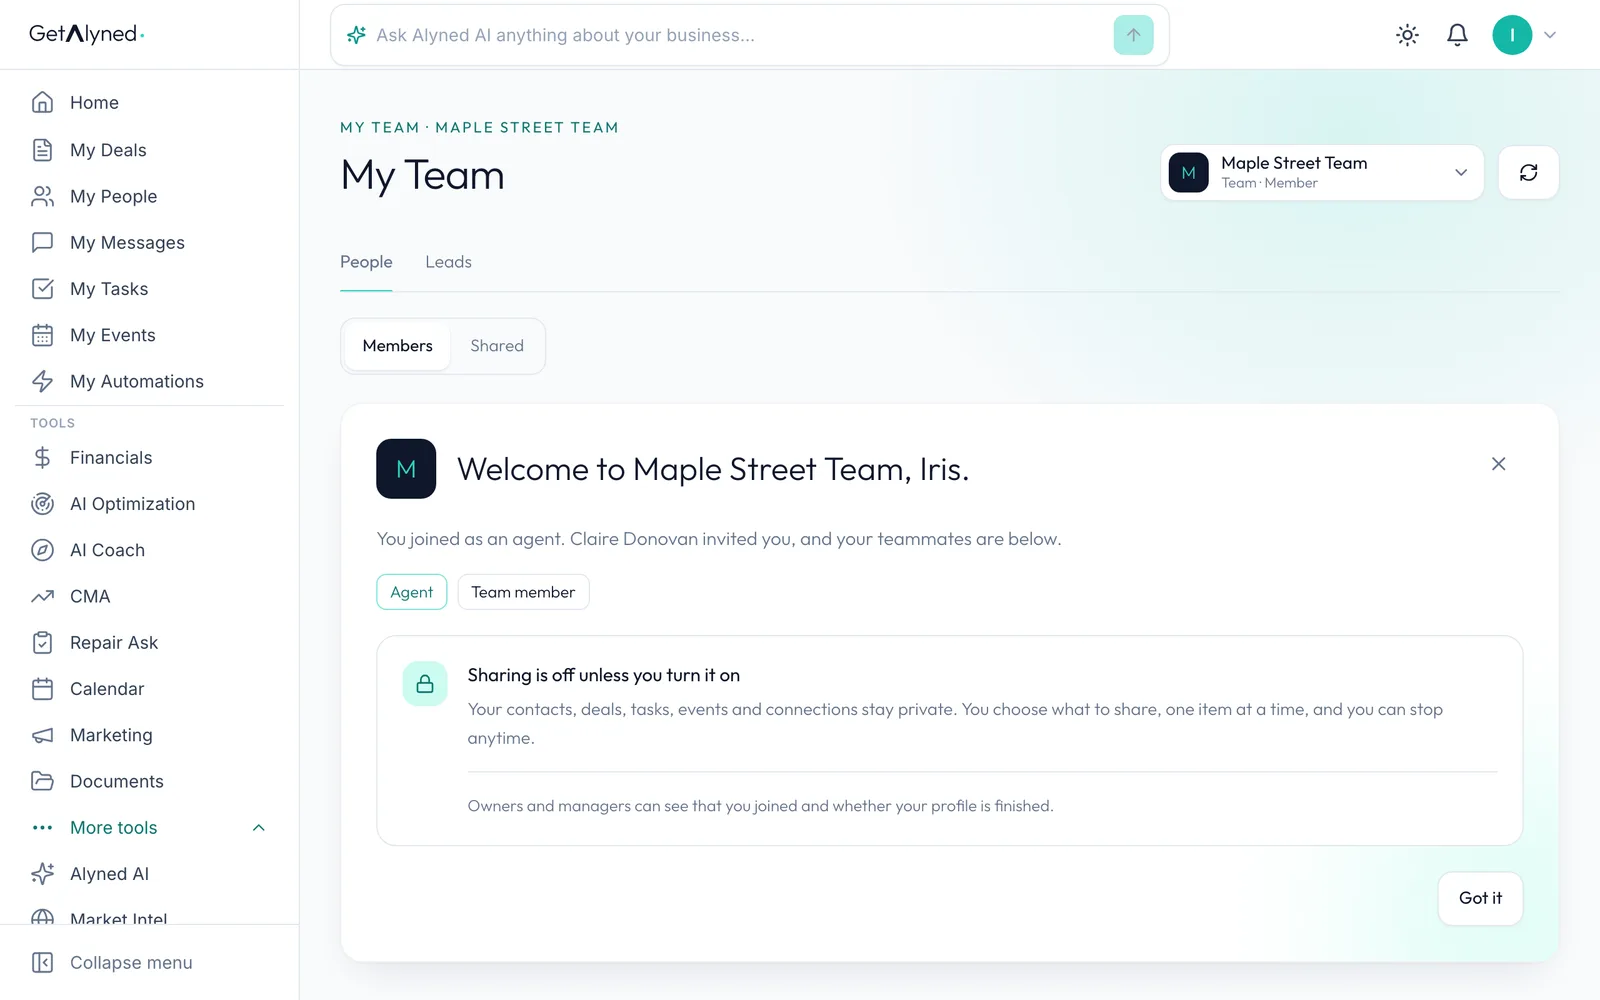
They land on the team. Nothing of theirs is shared until they choose to share it.
-
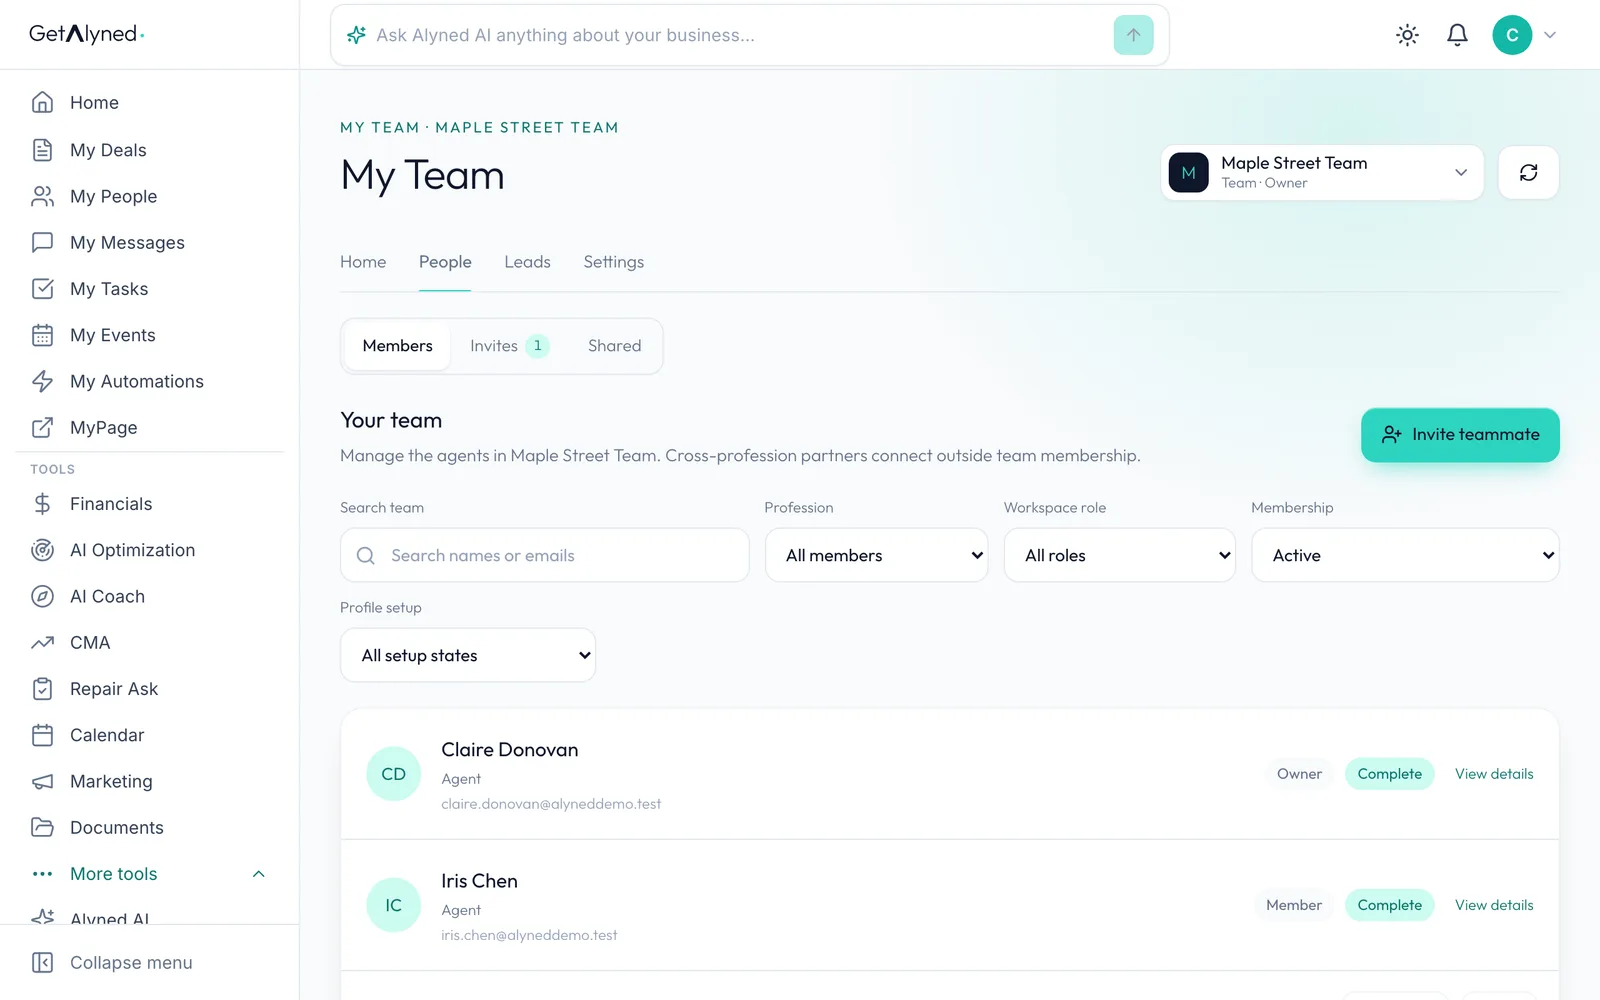
Members
Back on your side, Members now lists them with their role.
-
Open a member
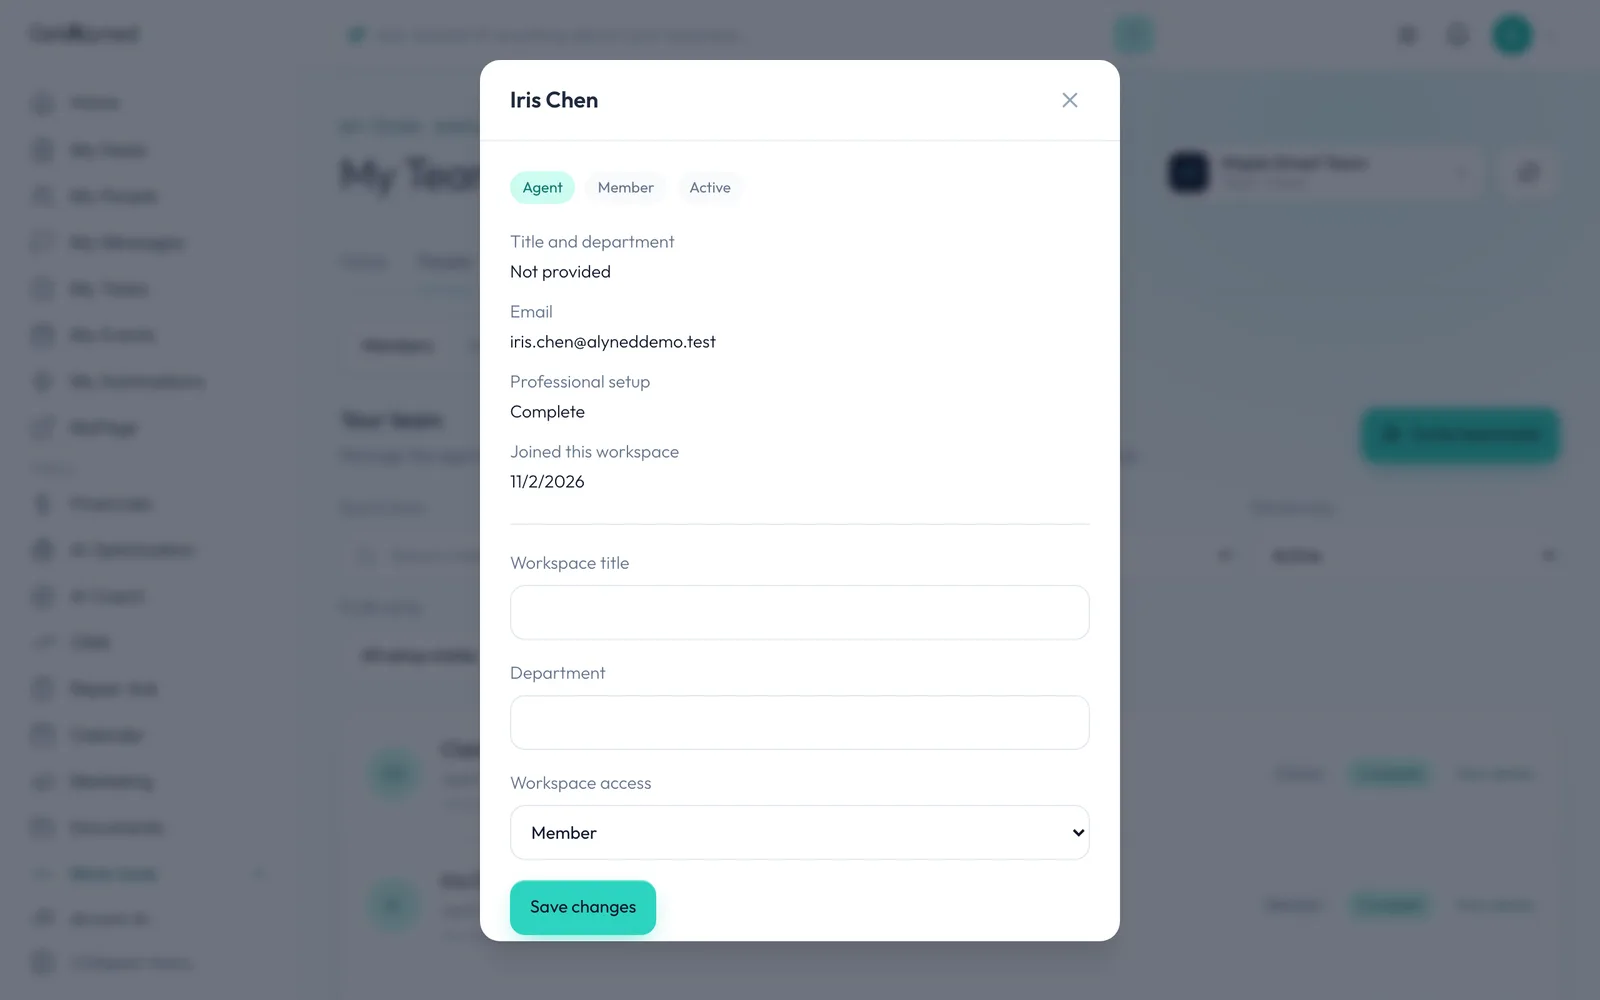
Open a member to change their title or role, or to suspend or remove them.
-
Workspace access
Workspace access is where a role changes: Member, Manager or Admin. Only the owner and admins can change it.
-
Team details
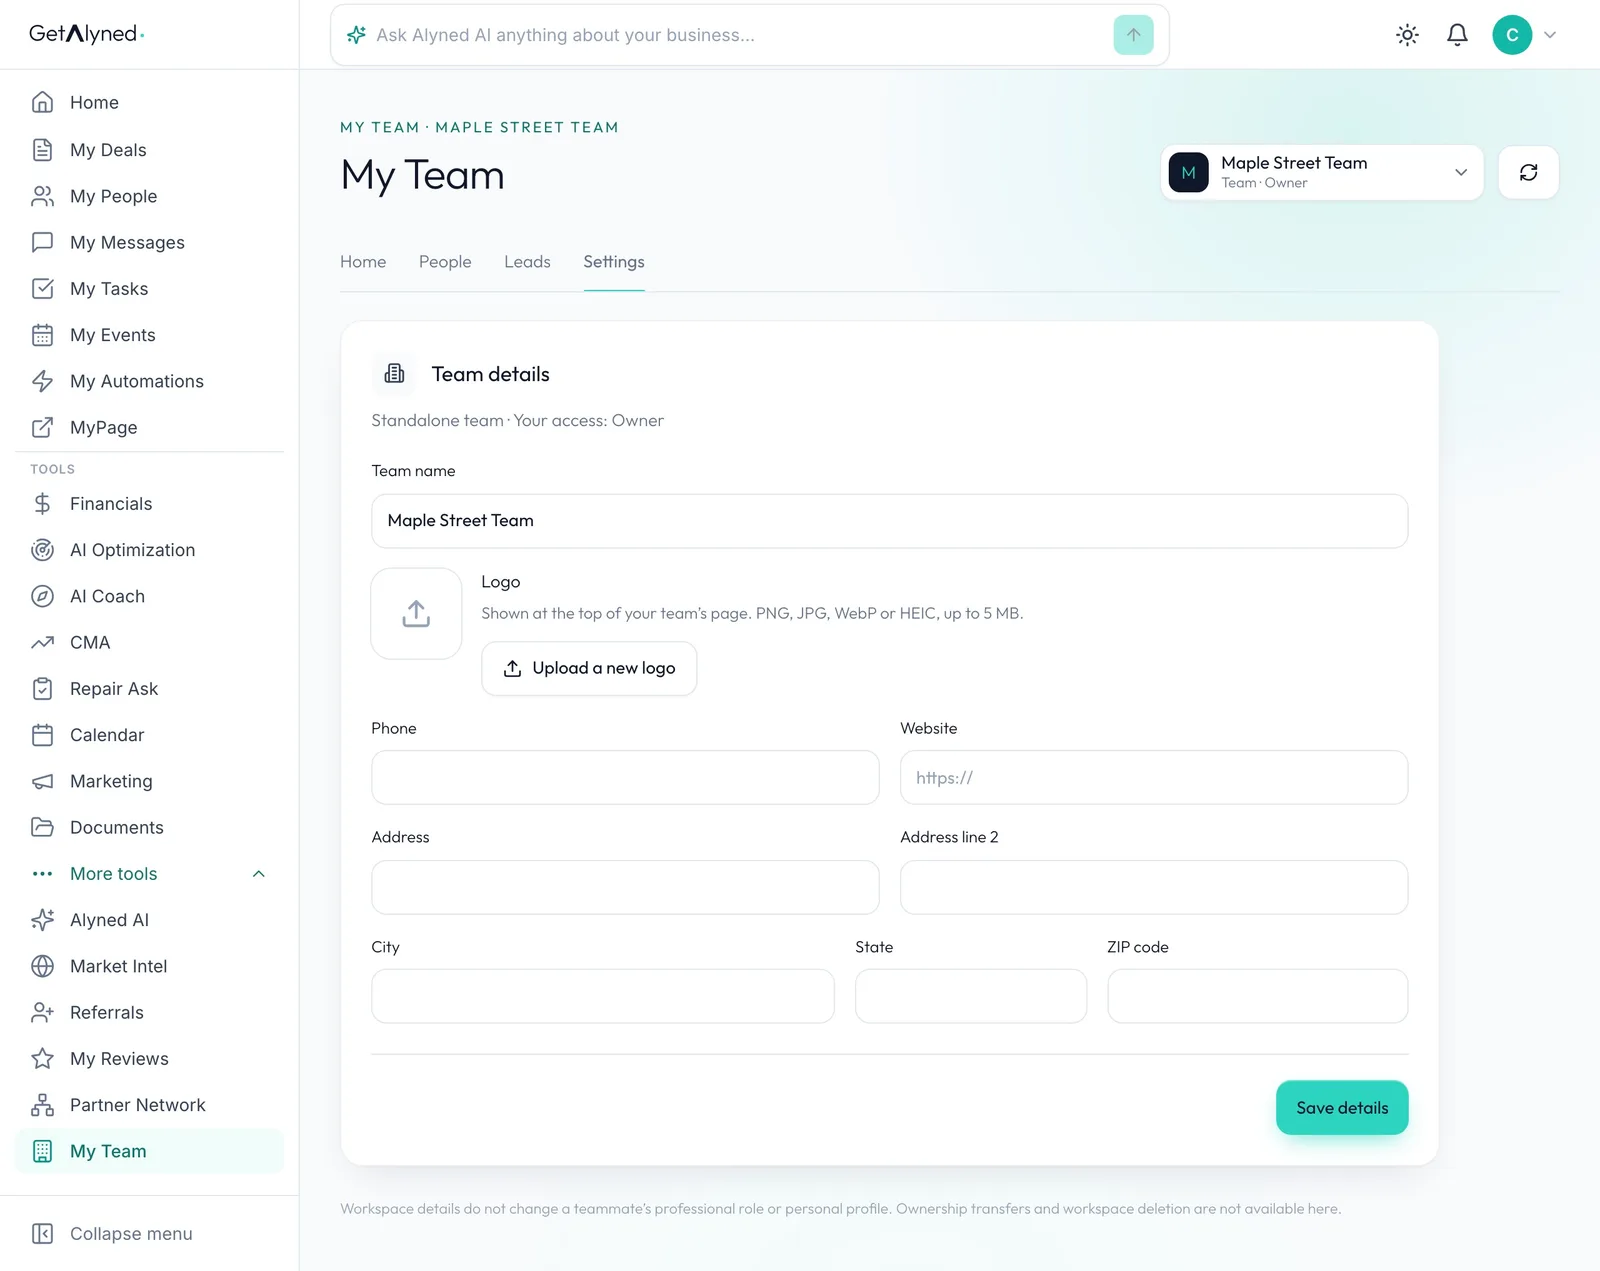
Team details, for the owner and admins, holds the name, logo, phone, website and address.
Related guides
- Share a contact or deal with your team · Everything in Alyned is private until you share it. Share one contact or deal at a time with your team's managers, and see exactly what they can read.
- Route and assign leads · Send each new lead to a team or an agent, assign it with a follow-up date, and reassign it if plans change. Every turn stays in the lead's history.
- Invite your loan officer or agents · Invite your loan officer to Alyned, or as a loan officer, invite your agents. When they sign up through your invite, you're connected automatically.